Spring Bean的管理
Spring Bean的管理
1.spring工厂类的介绍
工厂类接口:
1).ApplicationContext
每次容器启动时,就会创建容器配置的所有对象,并提供更多功能
1.相当于一个大工厂,提供了根据配置文件中的id属性值,获取对象
2.两个实现类:
a.ClassPathXmlApplication类:从类的根路径下加载配置文件(企业项目开发中,使用较多)
b.FileSystemXmlApplication类,从文件系统(磁盘)上加载配置文件
//从工厂中获取对象
applicationContext.xml配置文件

<bean id="customerDaoImpl" class="com.dao.impl.CustomerDaoImpl"></bean>

//获取对象
@Test
public void demo(){
	//创建ApplicationContext的实现类(创建工厂类)
  ApplicationContext context=new ClassPathXmlApplicationContext("applicationContext.xml");

  //获取对象(通过工厂获得类)
  CustomerDaoImpl customerDaoImpl=(CustomerDaoImpl) context.getBean("customerDaoImpl");

  //调用方法
  customerDaoImpl.saveCustomer();

}
2).BeanFactory:采用延迟创建的思想,
BeanFactory接口实现类的容器.特点是每次在获得对象时才会创建对象
public void demo2(){
	//创建工厂类;
  BeanFactory beanFactory=new XmlBeanFactory(new ClassPathResource("applicationContext.xml"));

  //通过工厂获得类
  UserService userService=(UserService) beanFactory.getBean("userService");

  //调用方法
  userService.sayHello();
3)BeanFactory和ApplicationContext区别
BeanFactory是工厂顶层接口
ApplicationContext是BeanFactory子接口
创建对象时间点不一样:
BeanFactory创建对象:什么时候使用,什么时候创建。采用延迟创建的思想
ApplicationContext创建对象:加载配置文件,立即创建。采用立即创建的思想
2.三种实例化Bean的方式:
一、使用构造器实例化:实例化的方式可能在我们平时的开发中用到的是最多的,因为在xml文件中配置简单并且也不需要额外的工厂类来实现。
<!--applicationContext.xml配置:-->

<bean id="personService" class="cn.mytest.service.impl.PersonServiceBean"></bean>
//id是对象的名称,class是要实例化的类,然后再通过正常的方式进调用实例化的类即可,比如:
public void instanceSpring(){
                //加载spring配置文件
        ApplicationContext ac = new ClassPathXmlApplicationContext(
                new String[]{
                        "/conf/applicationContext.xml"
                });
        //调用getBean方法取得被实例化的对象。
        PersonServiceBean psb = (PersonServiceBean) ac.getBean("personService");

        psb.save();
}
二、使用静态工厂方法实例化;
a.要有工厂类及其工厂方法;b.工厂方法是静态的
package cn.mytest.service.impl;

/**
*创建工厂类
*
*/
public class PersonServiceFactory {
    //创建静态方法
    public static PersonServiceBean createPersonServiceBean(){
         //返回实例化的类的对象
        return new PersonServiceBean();
    }
}
<!--applicationContext.xml配置:-->

<bean id="personService1" class="cn.mytest.service.impl.PersonServiceFactory" factory-method="createPersonServiceBean"></bean>
//id是实例化的对象的名称,class是工厂类,也就实现实例化类的静态方法所属的类,
//factory-method是实现实例化类的静态方法。
//然后按照正常的调用方法去调用即可:
public void instanceSpring(){
                //加载spring配置文件
        ApplicationContext ac = new ClassPathXmlApplicationContext(
                new String[]{
                        "/conf/applicationContext.xml"
                });
        //调用getBean方法取得被实例化的对象。
        PersonServiceBean psb = (PersonServiceBean) ac.getBean("personService1");

        psb.save();
}
三、使用实例化工厂方法实例化:
与使用该实例化方式工厂方法不需要是静态的,但是在spring的配置文件中需要配置更多的内容,,首先创 建工厂类及工厂方法:
package cn.mytest.service.impl;

/**
*创建工厂类
*
*/
public class PersonServiceFactory {
    //创建静态方法
    public PersonServiceBean createPersonServiceBean1(){
         //返回实例化的类的对象
        return new PersonServiceBean();
    }
}
<!--applicationContext.xml配置:-->

<bean id="personServiceFactory" class="cn.mytest.service.impl.PersonServiceFactory"></bean>

<bean id="personService2" factory-bean="personServiceFactory" factory-method="createPersonServiceBean1"></bean>
这里需要配置两个bean,第一个bean使用的构造器方法实例化工厂类,第二个bean中的id是实例化对象的名称,factory-bean对应的被实例化的工厂类的对象名称,也就是第一个bean的id,factory-method是非静态工厂方法。
public void instanceSpring(){
                //加载spring配置文件
        ApplicationContext ac = new ClassPathXmlApplicationContext(
                new String[]{
                        "/conf/applicationContext.xml"
                });
        //调用getBean方法取得被实例化的对象。
        PersonServiceBean psb = (PersonServiceBean) ac.getBean("personService2");

        psb.save();
}
3.Bean的配置:
- id和name:装配一个Bean时,通过指定一个id属性作为Bean的名称(id属性在IOC容器中必须是唯一的)
如果Bean的名称中包含有特殊字符,就需要使用name属性
- class:用于设置一个类的完全路径名称,主要作用是IOC容器生成类的实例
- Bean的作用域:scope属性
- Bean的生命周期:
<!--Bean的生命周期-->
  <bean id="user" class="com.xaomi.demo.User"  init-method="init" destory-method="destory" />


 //User类中
 public class User(){
    public User(){
		  System.out.println("User被实例化了");
    }
    public void init(){
			System.out.println("User被初始化了");
    }
    public void destory(){
			System.out.println("User被销毁了");
    }
 }

//Test类
public class Demo3(){
	@Test
  public void demo1(){
		ApplicationContext applicationContext=new ClassPathXmlApplicationContext("applicationContext.xml");
    User user=(User)applicationContext.getBean("user");
    System.out.println(user);
  }//不含bean被销毁

  //ClassPathXmlApplicationContext 实现类才有close方法,ApplicationContext接口类没有
  @Test
  public void demo2(){
		ClassPathXmlApplicationContext applicationContext=new ClassPathXmlApplicationContext("applicationContext.xml");
    User user=(User)applicationContext.getBean("user");
    System.out.println(user);

    applicationContext.close();
    //bean被销毁
}
4.Spring的属性注入:对于类成员变量,注入方式有三种
* 构造函数注入:通过构造方法注入Bean的属性值或依赖的对象,它保证了Bean实例在实例化后就可以使用
<!--Bean的构造方法注入  xml-->
  <bean id="user" class="com.xaomi.demo.User"   >
  	<constructor-arg name="name" value="张三" />
    <constructor-arg name="age" value="23" />
  </bean>


  //User类
    public class User {
    private String name;
    private Integer age;

    public User(String name,Integer age){
        this.name = name;
        this.age = age;
    }

    @Override
    public String toString() {
        return "User{" +
                "name='" + name + '\'' +
                ", age=" + age +
                '}';
    }
}

public class Demo4{
//Test类
@Test
    public void demo1(){
        ApplicationContext applicationContext = new ClassPathXmlApplicationContext("applicationContext.xml");
        User user = (User)applicationContext.getBean("user");
        System.out.println(user);
    }
}
* 属性setter方法注入:通过<property>设置注入属性的
//cat类
package com.xaomi.ioc.demo4;
public class Cat {
    private String name;

    public String getName() {
        return name;
    }

    public void setName(String name) {
        this.name = name;
    }

    @Override
    public String toString() {
        return "Cat{" +
                "name='" + name + '\'' +
                '}';
    }
}

//Person类
package com.xaomi.ioc.demo4;

public class Person {
    private String name;
    private Integer age;

    private Cat cat;

    public String getName() {
        return name;
    }

    public void setName(String name) {
        this.name = name;
    }

    public Integer getAge() {
        return age;
    }

    public void setAge(Integer age) {
        this.age = age;
    }

    public Cat getCat() {
        return cat;
    }

    public void setCat(Cat cat) {
        this.cat = cat;
    }

    @Override
    public String toString() {
        return "Person{" +
                "name='" + name + '\'' +
                ", age=" + age +
                ", cat=" + cat +
                '}';
    }
}

<!--Bean的set方法注入  xml-->
  <bean id="person" class="com.xaomi.demo.Person"   >
  	<property name="name" value="张三" />
    <property name="age" value="23" />
    <property name="cat" ref="cat" />
  </bean>
  <bean id="cat" class="com.xaomi.demo.Cat"   >
  	<property name="name" value="白猫" />
  </bean>
  * 接口注入-p名称空间
* 为了简化xml文件配置,spring从2.5开始引入一个新的p名称空间
* p:<属性名>="xxx" 引入常量值
* p:<属性名>-ref="xxx" 引用其它Bean对象
<!--Bean的p名称空间注入  xml-->
  <bean id="person" class="com.xaomi.demo.Person"   p:name="张三" p:age="34" p:cat-ref="cat">
  <bean id="cat" class="com.xaomi.demo.Cat"   p:name="大黄" />
* Spring的属性注入-SpEL注入
* spring表达式语言,对依赖注入进行简化
* <bean id="" value="#{表达式}">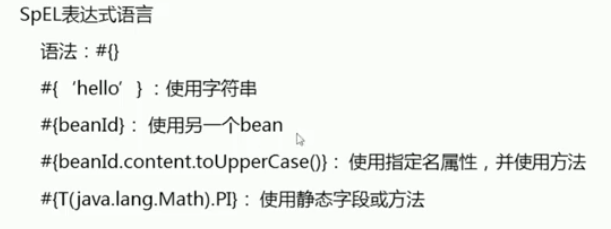
//产品类
package com.xaomi.ioc.demo4;

public class Product {
    private String name;
    private Double price;

    private Category category;

    public String getName() {
        return name;
    }

    public void setName(String name) {
        this.name = name;
    }

    public Double getPrice() {
        return price;
    }

    public void setPrice(Double price) {
        this.price = price;
    }

    public Category getCategory() {
        return category;
    }

    public void setCategory(Category category) {
        this.category = category;
    }

    @Override
    public String toString() {
        return "Product{" +
                "name='" + name + '\'' +
                ", price=" + price +
                ", category=" + category +
                '}';
    }
}

/*分类 类*/
package com.xaomi.ioc.demo4;

public class Category {
    private String name;

    public String getName() {
        return name;
    }

    public void setName(String name) {
        this.name = name;
    }

    @Override
    public String toString() {
        return "Category{" +
                "name='" + name + '\'' +
                '}';
    }
}


 <!--Bean的SpEL的属性注入==============================-->
    <bean id="category" class="com.imooc.ioc.demo4.Category">
        <property name="name" value="#{'服装'}"/>
    </bean>

    <bean id="productInfo" class="com.imooc.ioc.demo4.ProductInfo"/>

    <bean id="product" class="com.imooc.ioc.demo4.Product">
        <property name="name" value="#{'男装'}"/>
        <property name="price" value="#{productInfo.calculatePrice()}"/>
        <property name="category" value="#{category}"/>
    </bean>


public class Demo4{
//Test类
    @Test
    public void demo3(){
        ApplicationContext applicationContext = new ClassPathXmlApplicationContext("applicationContext.xml");
        Product product = (Product)applicationContext.getBean("product");
        System.out.println(product);
    }
}
  * 复杂类型的属性注入
* 数组类型的属性注入
* List集合类型的属性注入
* Set集合类型的属性注入
* Map集合类型的属性注入
package com.xaomi.ioc.demo5;

import java.util.*;

public class CollectionBean {
    private String[] arrs; // 数组类型

    private List<String> list;// List集合类型

    private Set<String> set; // Set集合类型

    private Map<String,Integer> map;// Map集合类型

    private Properties properties; // 属性类型

    public String[] getArrs() {
        return arrs;
    }

    public void setArrs(String[] arrs) {
        this.arrs = arrs;
    }

    public List<String> getList() {
        return list;
    }

    public void setList(List<String> list) {
        this.list = list;
    }

    public Set<String> getSet() {
        return set;
    }

    public void setSet(Set<String> set) {
        this.set = set;
    }

    public Map<String, Integer> getMap() {
        return map;
    }

    public void setMap(Map<String, Integer> map) {
        this.map = map;
    }

    public Properties getProperties() {
        return properties;
    }

    public void setProperties(Properties properties) {
        this.properties = properties;
    }

    @Override
    public String toString() {
        return "CollectionBean{" +
                "arrs=" + Arrays.toString(arrs) +
                ", list=" + list +
                ", set=" + set +
                ", map=" + map +
                ", properties=" + properties +
                '}';
    }
}


<!--集合类型的属性注入=================================-->
    <bean id="collectionBean" class="com.imooc.ioc.demo5.CollectionBean">
        <!--数组类型-->
        <property name="arrs">
            <list>
                <value>aaa</value>
                <value>bbb</value>
                <value>ccc</value>
            </list>
        </property>
        <!--List集合的属性注入-->
        <property name="list">
            <list>
                <value>111</value>
                <value>222</value>
                <value>333</value>
            </list>
        </property>
        <!--Set集合的属性注入-->
        <property name="set">
            <set>
                <value>ddd</value>
                <value>eee</value>
                <value>fff</value>
            </set>
        </property>
        <!--Map集合的属性注入-->
        <property name="map">
            <map>
                <entry key="aaa" value="111"/>
                <entry key="bbb" value="222"/>
                <entry key="ccc" value="333"/>
            </map>
        </property>
        <!--Properties的属性注入-->
        <property name="properties">
            <props>
                <prop key="username">root</prop>
                <prop key="password">1234</prop>
            </props>
        </property>
    </bean>


public class SpringDemo5 {
    @Test
    public void demo1(){
        ApplicationContext applicationContext = new ClassPathXmlApplicationContext("applicationContext.xml");

       CollectionBean collectionBean = (CollectionBean)applicationContext.getBean("collectionBean");

       System.out.println(collectionBean);
    }
}
5.Spring的Bean管理(注解方式):
- Spring2.5 引入使用注解去定义Bean
@Component 描述Spring框架中的Bean
三个等效注解: [email protected] 用于对DAO实现类进行注解
[email protected] 用于对Service实现类进行注解
[email protected] 用于对Controller实现类进行标注
- 使用@Autowired 进行自动注入
[email protected] 默认按照类型进行注入
-如果存在两个相同Bean类型相同,则按照名称注入
[email protected]注入时可以针对成员变量或者set方法
-通过@Autowired的required属性,设置一定要找到匹配的Bean
-使用@Qualifier指定注入Bean的名称
@Service("userService")
public class UserService {
    @Value("米饭") /*普通类型*/
    private String something;
    @Autowired		/*对象类型*/
    @Qualifier("userDao")

    private UserDao userDao;

    public String sayHello(String name){
        return "Hello" + name;
    }

    public void eat(){
        System.out.println("eat:"+something);
    }

    public void save(){
        System.out.println("Service中保存用户...");
        userDao.save();
    }
}

/* DAO */
@Repository("userDao")
public class UserDao {

    public void save(){
        System.out.println("DAO中保存用户...");
    }
}
- [email protected]注解:与@Autowired相同,按Bean名称注入
@Service("userService")
public class UserService {
    @Value("米饭")
    private String something;

    @Resource(name="userDao")
    private UserDao userDao;

    public String sayHello(String name){
        return "Hello" + name;
    }

    public void eat(){
        System.out.println("eat:"+something);
    }

    public void save(){
        System.out.println("Service中保存用户...");
        userDao.save();
    }
}
- Spring其它注解:
/* demo1 bean的生命周期*/
@Component("bean1")
public class Bean1 {

    @PostConstruct
    public void init(){
        System.out.println("initBean...");
    }

    public void say(){
        System.out.println("say...");
    }

    @PreDestroy
    public void destory(){
        System.out.println("destoryBean...");
    }
}


/* demo2 bean的作用域*/
@Component("bean2")
@Scope("prototype")  /*多例,生成bean的地址不一样*/
public class Bean2 {

}
    @Test
    public void demo2(){
        ClassPathXmlApplicationContext applicationContext = new ClassPathXmlApplicationContext("applicationContext.xml");

        Bean2 bean1 = (Bean2)applicationContext.getBean("bean2");
        Bean2 bean2 = (Bean2)applicationContext.getBean("bean2");

        System.out.println(bean1 == bean2);

    }
6.传统XML配置和注解配置混合使用
- XML方式的优势
- 结构清晰,易于阅读
- 注解方式的优势
- 开发便捷,属性注入方便
public class ProductService {
    @Resource(name="categoryDao")
    private CategoryDao categoryDao;

    @Resource(name="productDao")
    private ProductDao productDao;

/*    public void setCategoryDao(CategoryDao categoryDao) {
        this.categoryDao = categoryDao;
    }

    public void setProductDao(ProductDao productDao) {
        this.productDao = productDao;
    }*/

    public void save(){
        System.out.println("ProductService的save方法执行了...");
        categoryDao.save();
        productDao.save();
    }
}
<?xml version="1.0" encoding="UTF-8"?>
<beans xmlns="http://www.springframework.org/schema/beans"
       xmlns:xsi="http://www.w3.org/2001/XMLSchema-instance"
       xmlns:context="http://www.springframework.org/schema/context" xsi:schemaLocation="
        http://www.springframework.org/schema/beans http://www.springframework.org/schema/beans/spring-beans.xsd
        http://www.springframework.org/schema/context http://www.springframework.org/schema/context/spring-context.xsd">

    <!--开启注解扫描=======================-->
<!--    <context:component-scan base-package="com.imooc"/>-->

    <context:annotation-config/>

    <bean id="productService" class="com.imooc.demo3.ProductService">
       <!-- <property name="productDao" ref="productDao"/>
        <property name="categoryDao" ref="categoryDao"/>-->
    </bean>

    <bean id="productDao" class="com.imooc.demo3.ProductDao"/>

    <bean id="categoryDao" class="com.imooc.demo3.CategoryDao"/>
</beans>